 Decks
DecksiPhone
Start with the steps below. Editing tools appear beneath the canvas; tap the active tool to hide or show its controls.
iPad
Use the same task steps. The sidebar gives you access to Home, Templates, and Projects. In a wide editor window, controls can sit alongside the canvas; narrower windows use the compact panel. A missing control may be inside a collapsed section or the page’s options.
Open the builder
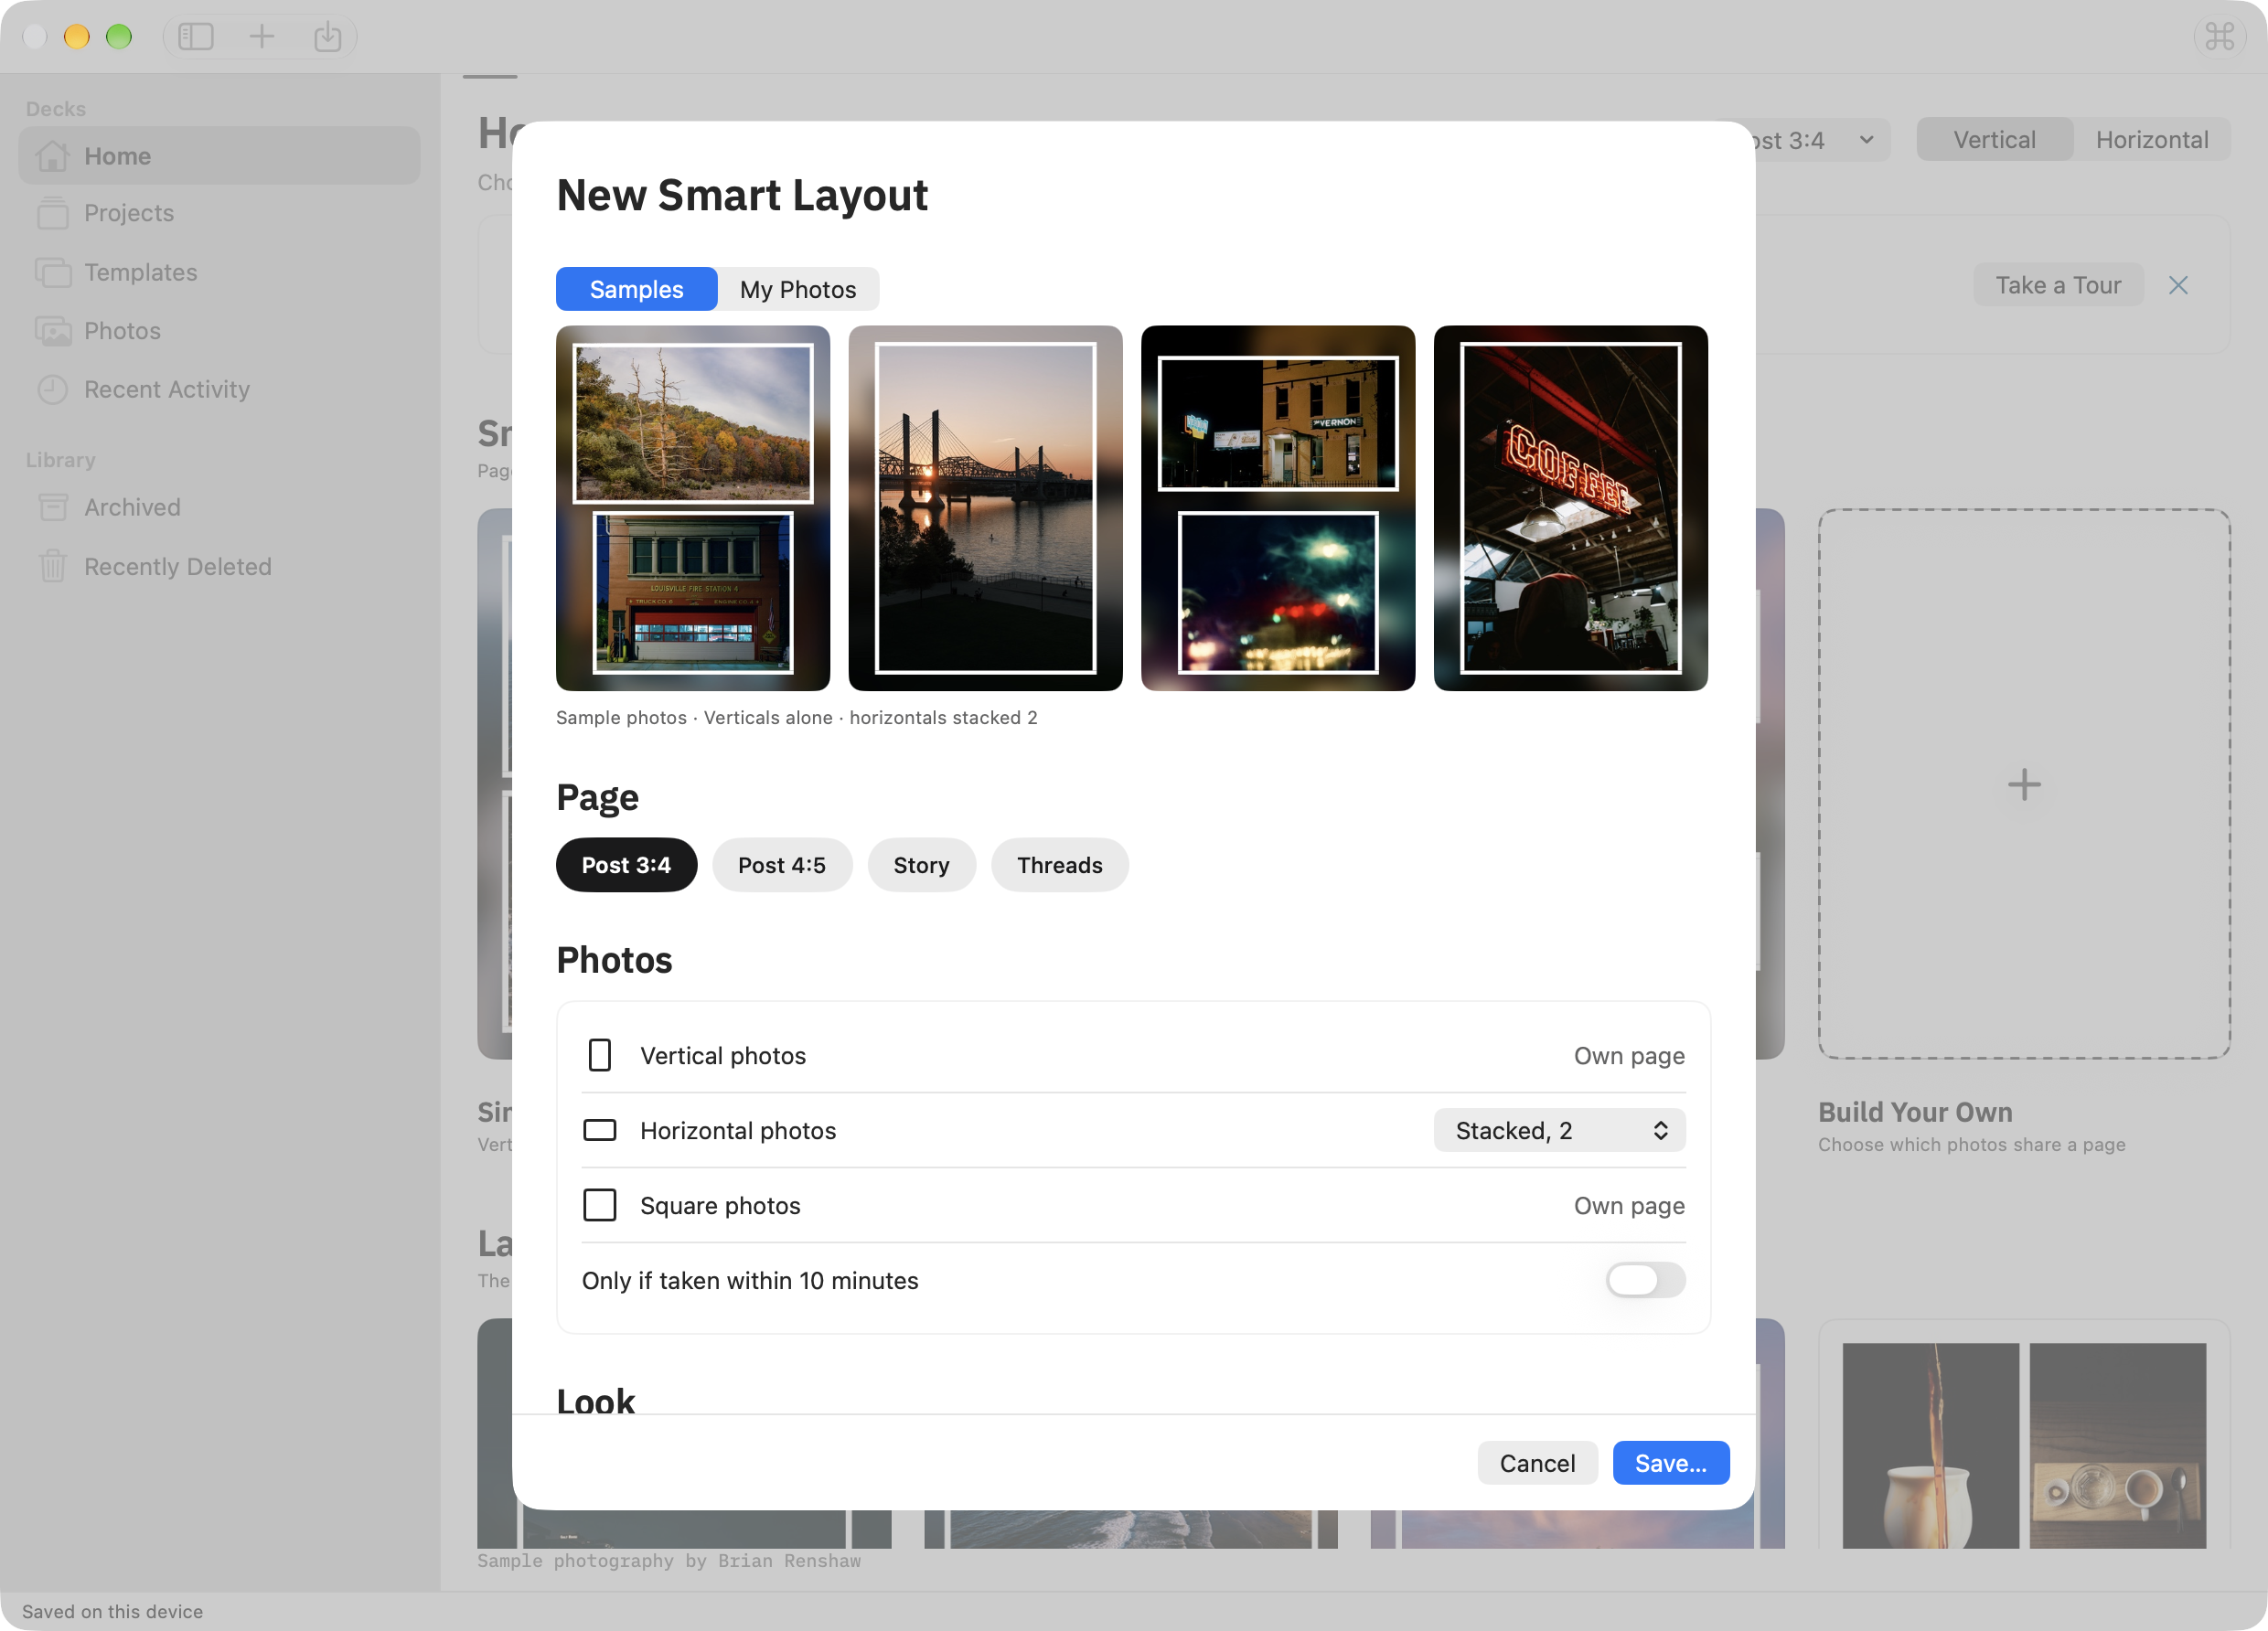
- On Home, scroll to the end of Smart layouts and tap Build Your Own.
- Or open Templates and tap Smart Layout. On iPad, Templates also has New Smart Layout in the toolbar.
- To change a smart layout you saved, touch and hold it in Templates and choose Edit Smart Layout. Your changes keep its page shape.
Set the rules
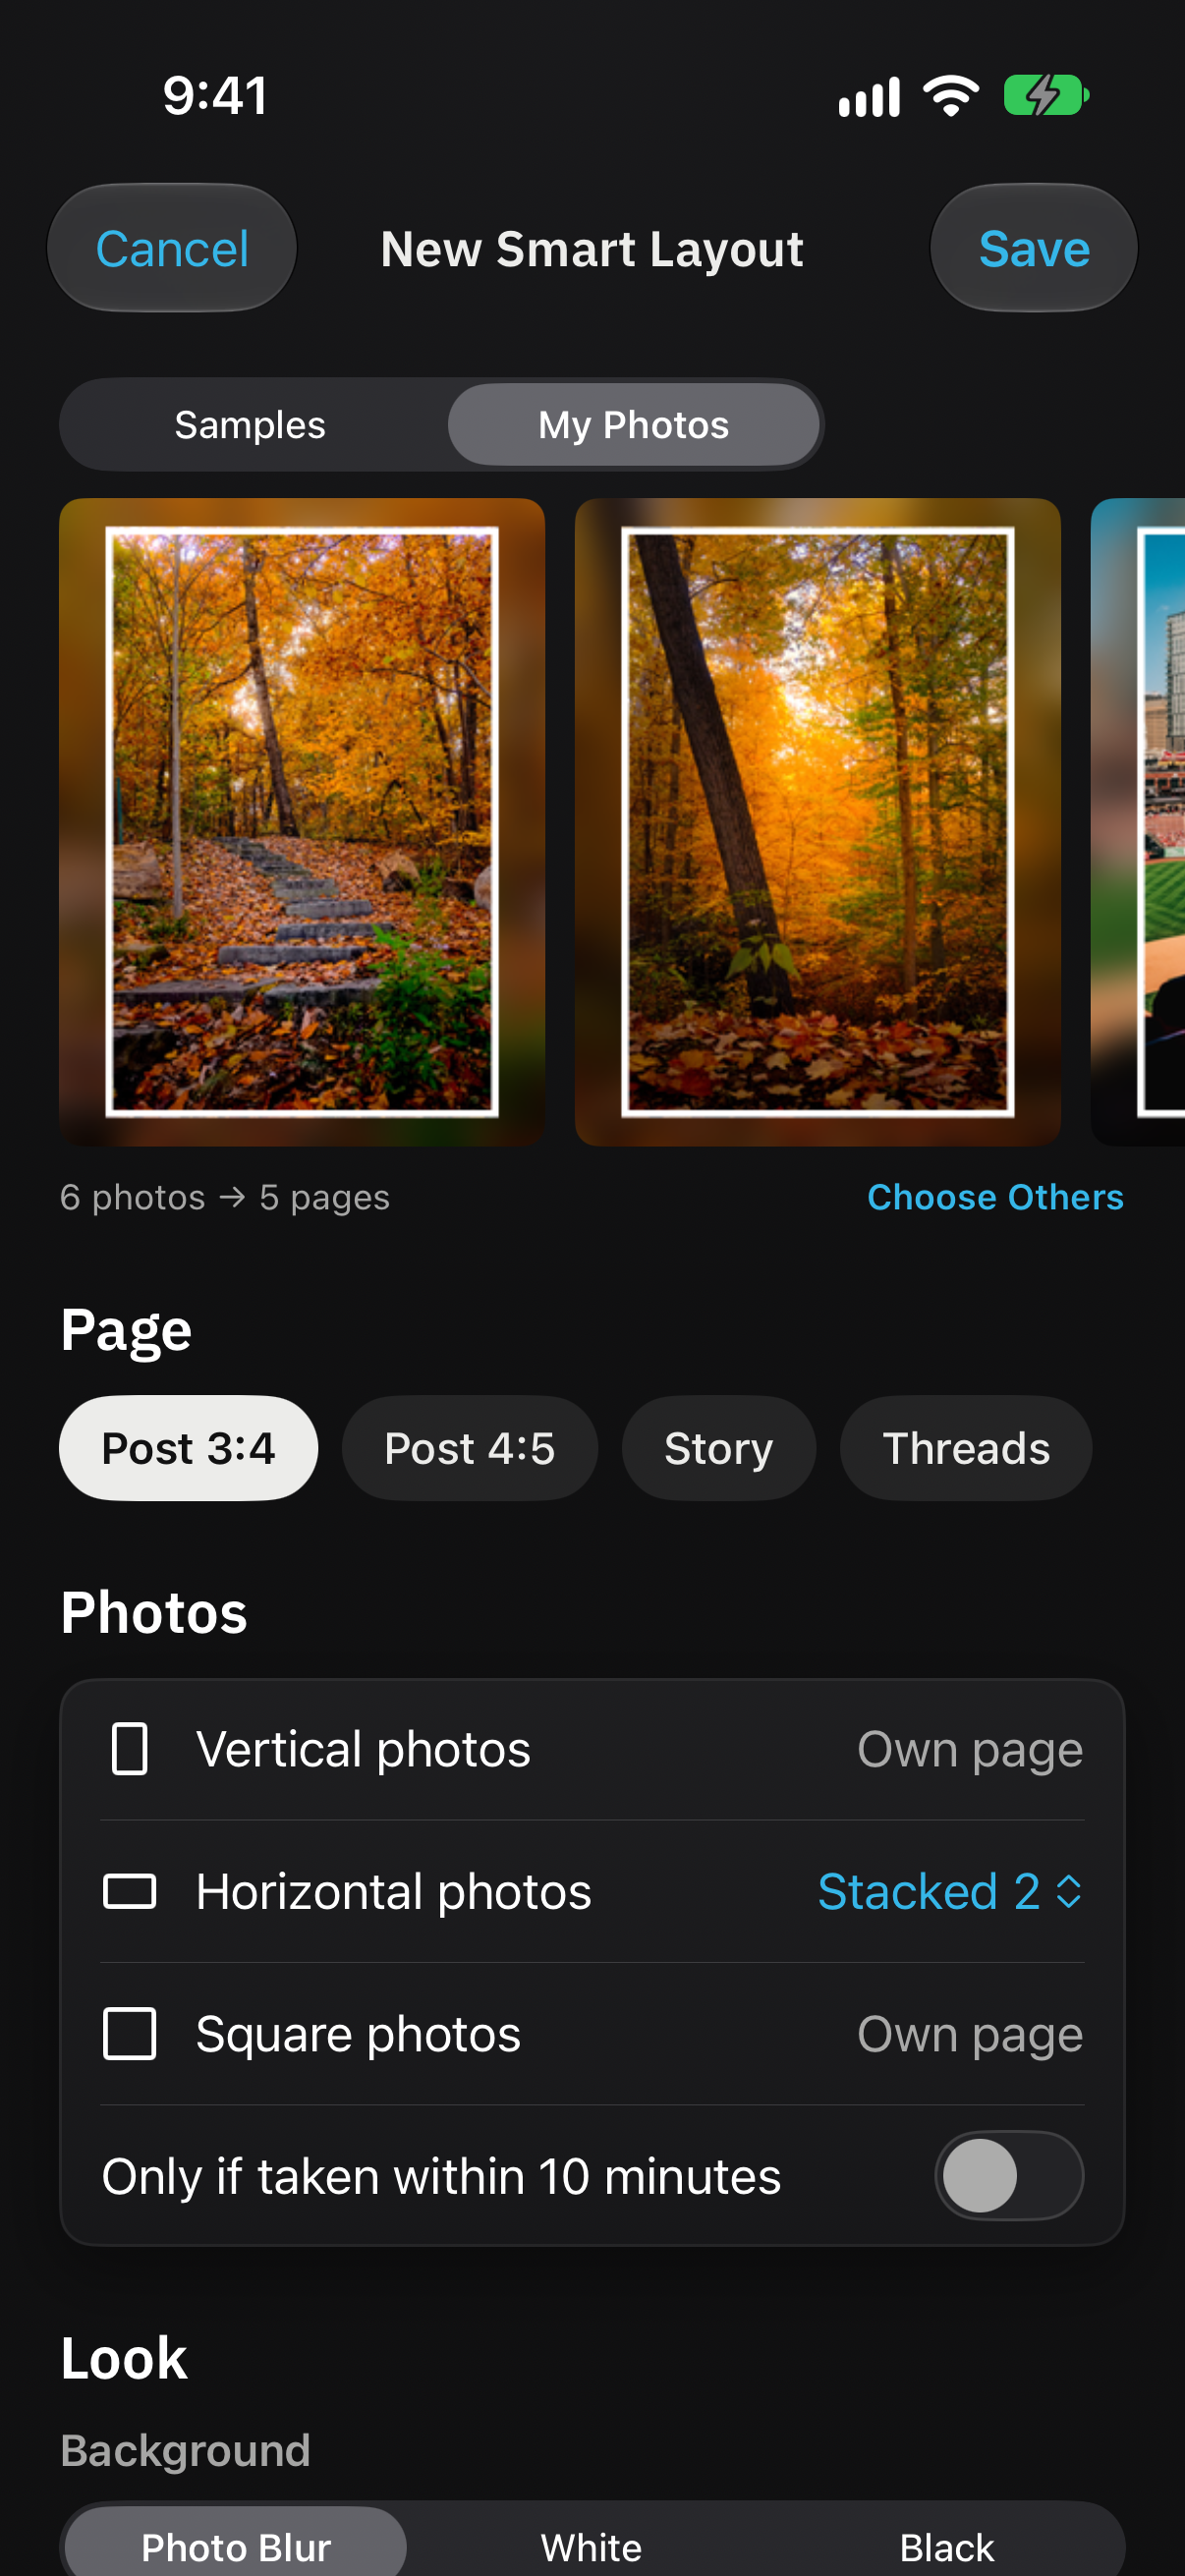
- Page chooses the page shape from your destinations, as on Home.
- Under Photos, the photos shaped like the page get their own page. For the photos shaped across it, choose how they share a page: Stacked, 2; Stacked, 3; Side by Side, 2; Side by Side, 3; or Grid of 4. Square photos get their own page.
- Turn on Only if taken within 10 minutes to share a page only between photos taken close together.
Choose the look and camera details
- Under Look, choose a Background (Photo Blur, White, or Black) and a Border (None, Auto, White, or Black).
- Turn on Use for New Photos to make this smart layout the default for Add Photos & Videos and Photos → Share → Decks.
- Turn on Camera Details and choose which details show. For a saved smart layout, choose the details later in the editor’s Camera tool.
Preview and save
- The pages at the top change as you choose. Preview With switches between Samples and My Photos. My Photos asks you to pick photos; Choose Others picks a different set. Your photos are used only for the preview.
- Tap Save and name the smart layout. Decks suggests a name that describes the rules, such as Singles & Threes.
- Your smart layout appears under Smart Layouts in Templates. Tap it and choose Use Template to lay out new photos, or mark it as a favorite to show it in Favorites on Home.
Mac
Open the builder
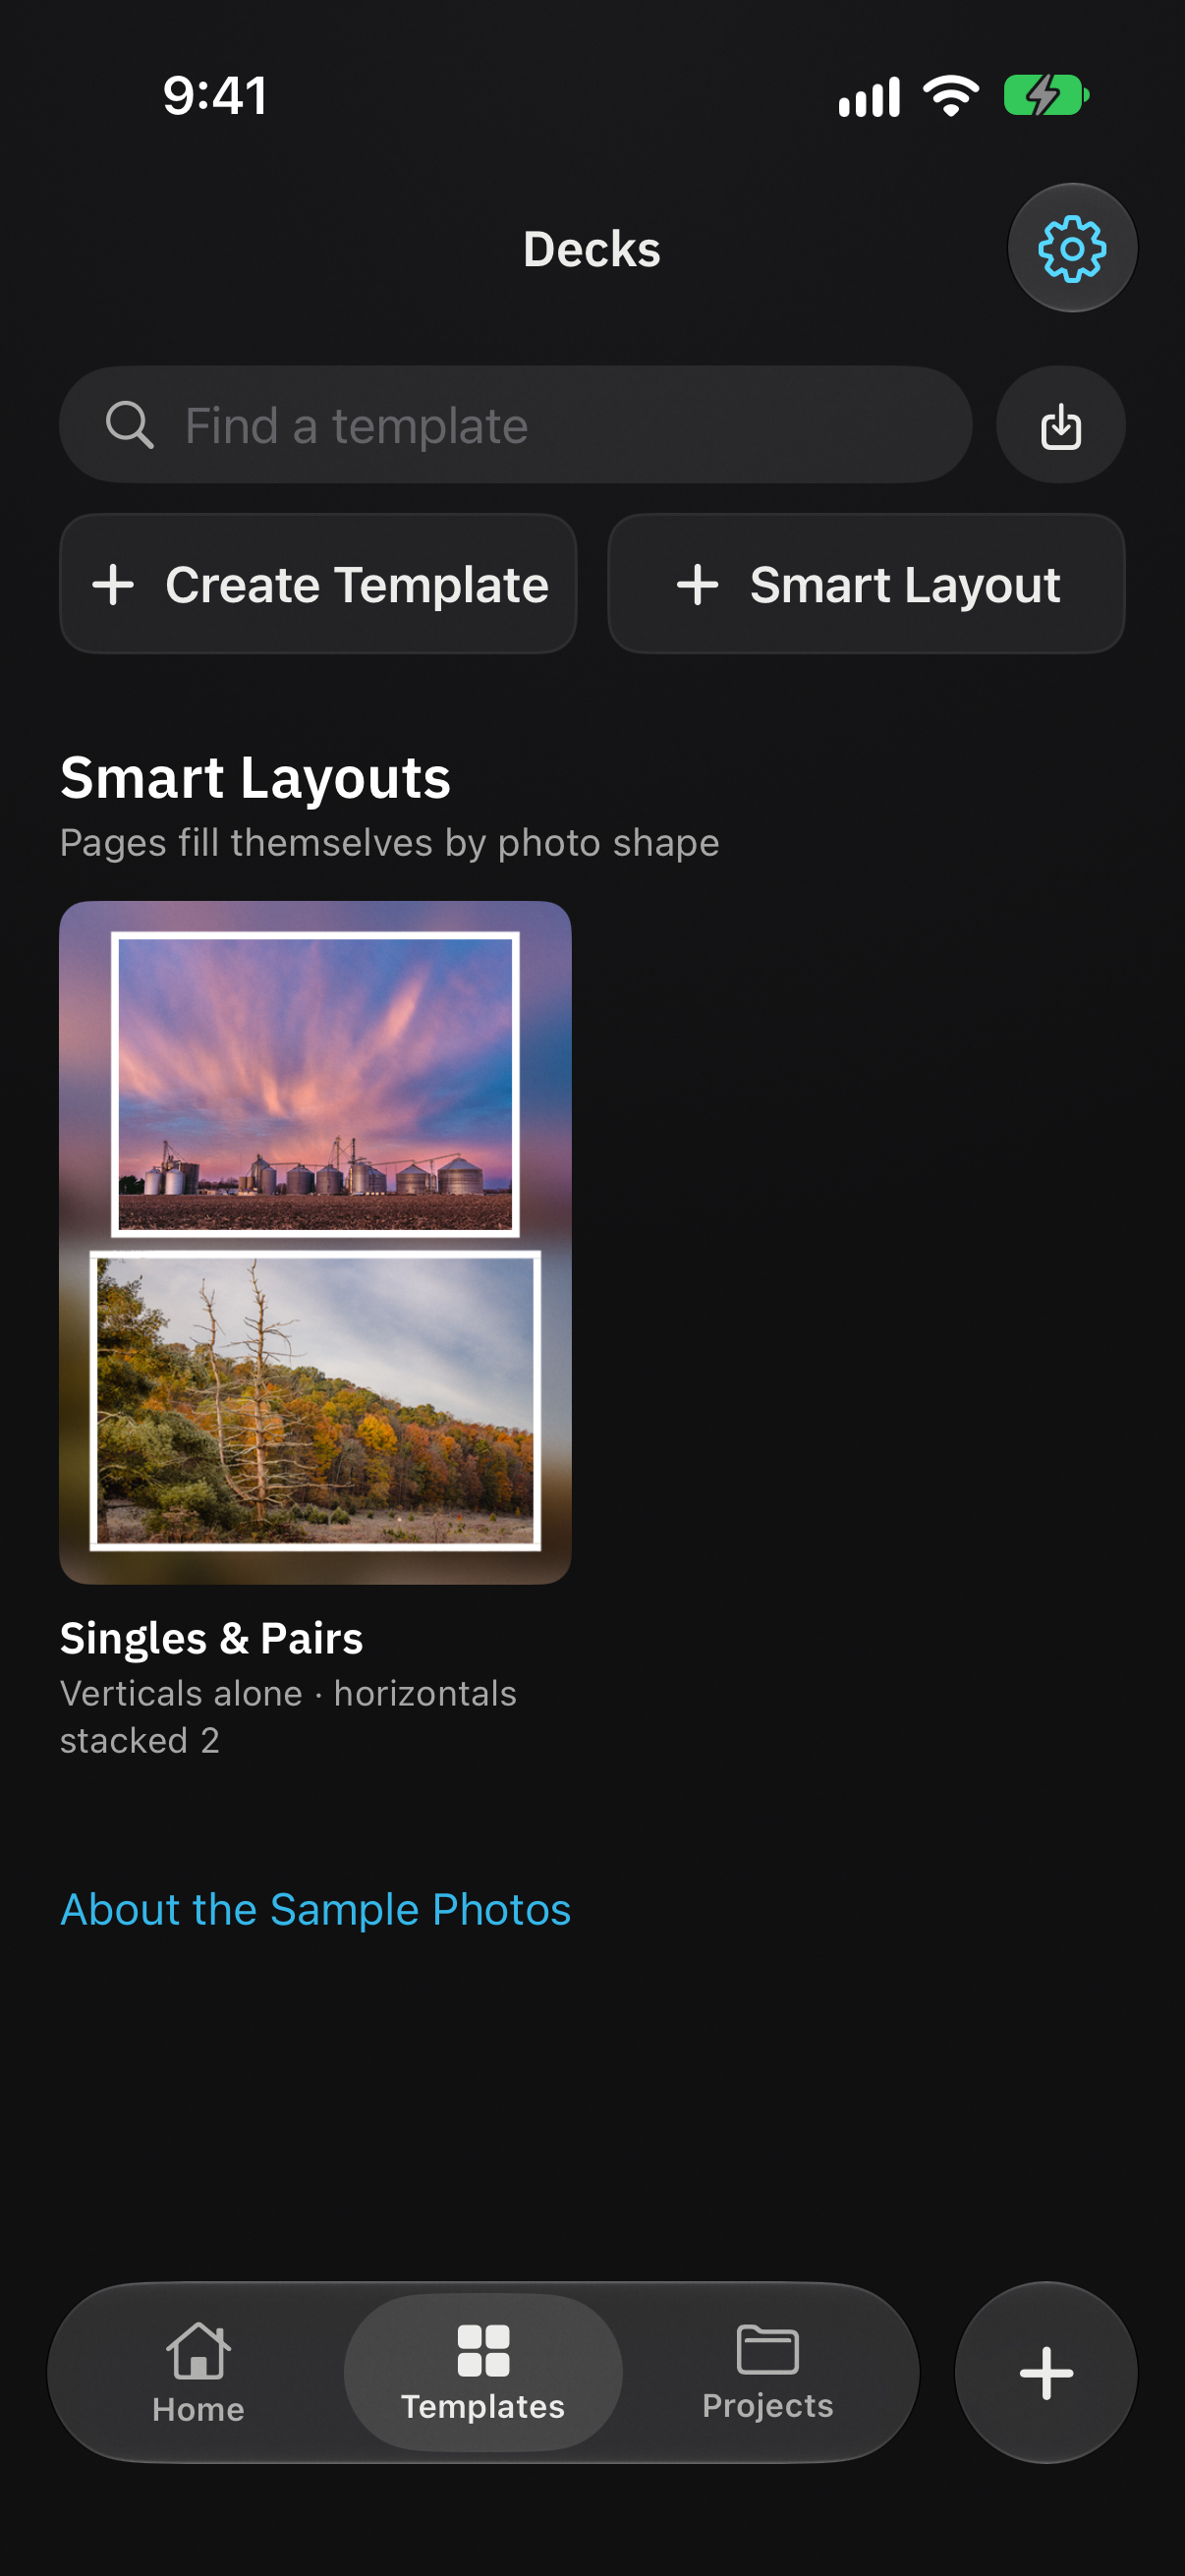
- On Home, click Build Your Own at the end of Smart layouts. Or click Templates in the sidebar (⌘3), then New Smart Layout.
- To change one you saved, Control-click it in Templates and choose Edit Smart Layout.
Set the rules and look
- Page chooses the page shape from your destinations.
- Under Photos, the photos shaped like the page get their own page. Choose how the others share a page: Stacked, 2; Stacked, 3; Side by Side, 2; Side by Side, 3; or Grid of 4. Square photos get their own page. Only if taken within 10 minutes limits sharing to photos taken close together.
- Under Look, choose a Background and Border. Use for New Photos makes this smart layout your New Project Template.
- Turn on Camera Details and choose which details show.
Preview and save
- Preview With switches the pages at the top between Samples and My Photos. Choose Others picks a different set of your photos. The copies are for the preview only and are removed when the builder closes.
- Click Save… and name the smart layout, or click Cancel to close without saving. It appears under Smart Layouts in Templates.